Tuesday, August 31, 2010

Lobster Hand and Footprints!

Ty's Lobster Connor's Lobster
The theme this week is the color red.
Project: Lobster Hand and Footprints. I saw this cute project on the blog www.adventures-in-mommyland.blogspot.com
Directions: Paint 1 foot red and press onto white paper. Paint both hands red and press onto paper above the heel of the footprint. Paint red stripes off both sides of footprint. Let dry. Glue on googly eyes. Draw mouth, nose and antennae with black marker. Materials Needed: white paper, red paint, paint brush, googly eyes, black marker

Monday, August 30, 2010

Masks are so much fun to make!

"Masks are so much fun to make." I heard this many times today as we were making these masks. My cousin and her 3 kids came over to play this morning. They love to do projects just like my kids. The two older kids decided we needed to make masks. I traced an old tiger mask onto colored foam and let the kids go to town with foam, buttons, feathers . . . and anything else they could find. Addie made one too, but she didn't make it into the picture with the other kids. The older kids even cut out their own masks! Materials Needed: foam, buttons, feathers, markers, scissors and party hat string, and anything else!

Friday, August 27, 2010

Cut and Paste Paper Apples!

Connor's and Ty's Apples

Day 3 of the week. The theme this week is Back to School!
Project: Cut and Paste Paper Apples - I found the apple template at http://www.dltk-kids.com/school/crafts.html under back to school. I printed the apple template. Ty and Connor cut red, brown and green pieces out of construction paper and glued the pieces onto their individual apples. When the glue was dry, I cut the apples out. Connor and Ty also added a worm to their apples. Addie got in on the action by coloring her own apple. Materials Needed - apple template, red, green and brown construction paper, scissors, glue stick


Addie's Apple

Tuesday, August 24, 2010

Paper School Bus!

Addie's Bus Ty's Bus
Connor's Bus

Day 2 of the week. The theme this week is Back To School.
Project - Paper School Bus. I saw this craft on http://www.notimeforflashcards.com/
I cut a school bus shape out of yellow construction paper. I traced wheels on black construction paper and Connor cut them out. I cut out squares for windows and long rectangular strips for the side of each bus. I also cut small yellow circles for the middle of each wheel. Connor, Ty and Addie (with assistance) glued the bus pieces to their individual pieces of construction paper. Connor wrote the word school with marker on the side of his bus.
Materials Needed: construction paper, black and yellow construction paper, scissors, glue stick

Monday, August 23, 2010

Beaded Backpack Key Rings!

Day 1 of the week. The theme this week is Back To School!
Connor will be starting Kindergarten next week and Ty will be starting 4K, so it is only fitting that our theme this week is Back To School!!

Project: Beaded Backpack Key Rings. Connor, Ty and Addie strung colored beads onto their individual pipe cleaners. Connor and Ty also spelled out their names with letter beads. Connor added "I Rock" as a special touch to his key ring :) I spelled out Addie's name for her. Addie strung all of the beads on by herself (except for her letter beads) she finished before Ty and Connor!! Then I twisted one end of the piper cleaner around a looped key ring, and the other end I twisted shut so the beads wouldn't fall off. Then Addie wanted her bead key ring attached to Connor's lunch box and Connor put his key ring on his backpack. Materials Needed: colored beads, letter beads, pipe cleaners, key rings

Thursday, August 19, 2010

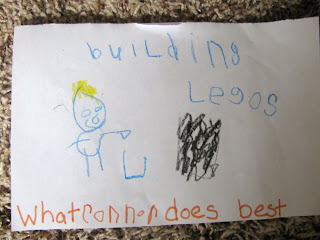
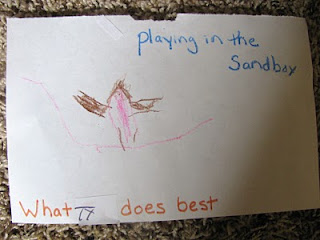
What I Do Best!


Day 3 of the week. The theme this week is Me and My Family!
Project - What I do Best. I wrote "What ___________ do best" Connor and Ty had to tell me something that they do really well. Connor chose building legos and Ty chose playing in the sandbox. They both wrote their individual names in the sentence stem and illustrated what they do best. Materials Needed: paper cut in half, crayons

Wednesday, August 18, 2010

Me Person!

Day 2 of the week. The theme this week is Me and My Family!
Project - Me Person! Directions: Trace a gingerbread man cookie cutter onto white tag board. Cut the figure out and decorate with clothes, buttons, markers, crayons, beads . . . . so that the figure looks like yourself! Materials Needed: white tag board, pencil, construction paper, beads, markers, crayons, buttons, gingerbread man cookie cutter and any other material you want.

Tuesday, August 17, 2010

Family Portraits!

Connor's Family Portrait

Ty's Family Portrait

Day 1 of the week. The theme this week is Me and My Family!
Project - Family Portraits. We talked about who was in each of our families. I explained that when I was little my family was my Dad and Mom, 2 brothers and 2 sisters. Then, Connor and Ty (and Addie) told me about each of their families. Next, I explained that they were going to draw their family. I demonstrated by drawing my dad and mom. Finally, Connor and Ty got to work drawing their individual families! They both did a great job - (Connor is 5 and Ty just turned 4) Materials Needed - paper, crayons

Monday, August 16, 2010

Recycled Piggy Bank

Recycled Piggy Bank - This project took a couple of days to complete, because we were busy getting ready for Addie's 2nd birthday party. Caitlyn and Connor had fun making their very own piggy bank.
This project if from Family Fun Magazine www.familyfun.com/magazine I am not sure what March issue it is from.

Materials Needed: paintbrush, pink paint, 2 toilet tissue rolls, scissors, pink tissue paper, clean 2-liter plastic bottle (we used a water bottle instead for a smaller version), Mod Podge, 2 googly eyes, pink two holed button, tacky glue, craft knife, pink pipe cleaner.

Directions: 1. Paint the outside of both tubes pink. Paint half of the inside of one tube pink. Let dry. 2. Cut the tissue paper into 1 1/4 inch squares. Brush a small section of the bottle with Mod Podge, lay a square on it, and brush Mod Podge on top of the square. Repeat the process until the bottle, including the capped spout, is covered, let dry. 3. For the ears, cut 2 deep U shapes from the tube that's painted pink inside. Cut 3 1/4 inch slits in the base of each ear. Bend back the flaps to create gluing tabs. For the legs, cut 4 1 1/2 inch long sections from the tubes (cut smaller sections if using water bottle). Trim each leg to fit the contour of the bottle. Attach the legs, the ears, the googly eyes, and the button nose with craft glue (I used hot glue for the legs) let dry. 4. Use the craft knife to cut a rectangular coin slot in the pig's back. Wind the pipe cleaner around a finger to make a tail shape, then glue it in place. 5. With scissors, trim the legs as shown so that the pig will stand flat.

Wednesday, August 11, 2010

Sparkling Sun Catchers!

Connor and his sun catcher!

Day 1 of the week. No Theme This Week!!
Project - Sparkling Sun Catchers. This project comes from the April 2006 issue of Family Fun Magazine. Materials Needed: 2 1/2 feet of gauge beading wire, 25-30 translucent colored beads, ruler, wire snips, spice bottle, clear fishing line. (We scaled down this project and used about 15 beads) 1. Bend and twist a hanging loop at one end of the wire. 2. Thread a bead onto the other end of the wire and push it up until it sits about 1 inch from the bottom of the hanging loop. Bend the wire in a Z shape around the bead to lock it in place, pressing the wire so that it hugs the bead tightly. 3. Thread on the rest of the beads using the same technique. We threaded our beads about an inch apart. Leave at least 1 1/2-inch tail of wire after the last bead. Wrap this end snugly around the bead twice, then snip off any excess wire. 4. Mold the sun catcher into a spring by gently wrapping it around a small spice bottle. 5. Finally, tie a length of fishing line to the loop at the top and hang the sun catcher where it can sparkle in sunlight.

Wednesday, August 4, 2010

Hickory Dickory Dock!

The clocks

Day 3 of the week. The theme this week is Nursery Rhymes!
Project- Hickory Dickory Dock Clock and Mouse. We recited the rhyme a bunch of times. Then the kids assembled the mice. I used gray cardboard, so I cut out the shapes. If I would have had gray construction paper the kids would have done the cutting. They glued on all of the pieces and I stapled a piece of yarn to the back for a tail. Next, I used a small paper plate for the clock. Connor wrote his own numbers on the clock and I wrote the numbers for Ty. I made hands for the clock and used a brad fastener to attach the hands to the clock. Connor and Ty glued the clock to card stock. Then they drew and colored the rest of the clock. We recited the rhyme a few more times as they acted it out with their clocks and mice! Materials Needed: gray paper, pink paper, yarn stapler, glue, googly eyes, buttons, small paper plate, markers, brad fastener, card stock, crayons
Source: I modified some of the ideas from www.thevirtualvine.com under Nursery Rhymes and Hickory Dickory Dock


Tuesday, August 3, 2010

Jack Be Nimble!

Jump!

Day 2 of the week! The theme this week is Nursery Rhymes!
Project - Jack Be Nimble Candlesticks - We recited Jack be nimble, Jack be quick, Jack jump over the candlestick a few times. Then we made candlesticks out of paper plates, cardboard tubes and coffee filters. Directions: Paint a cardboard tube white, let dry. Hot glue the cardboard tube to a paper plate. Paint a coffee filter with orange, red and yellow watercolor paint, let dry. Crumple painted coffee filter and stuff into the top of painted cardboard tube. Then recite the rhyme and have the kids jump over the candlestick. I wrote the rhyme on the paper plate inserting each child's name where Jack's name is said. Materials Needed: paper plate, cardboard tube, coffee filter, white paint, paint brush, watercolor paints

The candlesticks!

Monday, August 2, 2010

Hey Diddle Diddle!

Ty's illustrations!
Connor's illustrations!

Day 1 of the week. The theme this week is Nursery Rhymes!
Project: We recited the nursery rhyme Hey Diddle Diddle the cat and the fiddle . . . . Connor, Addie and Ty had fun reciting it over and over. Earlier, I had made a story board for each child with the rhyme broken up into 4 parts. Connor and Ty illustrated each part of the rhyme and then retold the rhyme back to me - Addie just scribbled on her paper while repeating the rhyme over and over and over!! The end results were great! Materials Needed: white paper, crayons